Table of Contents
What is the Admin panel/console and how to use it? The admin console is an advanced feature of Mailfence available only to paying users. It allows you to create additional users and to manage them seamlessly.
This is an extremely convenient feature if you are a business owner or an individual who needs separate accounts for his/her family and wants to manage them in one place.
What can you do with the admin console
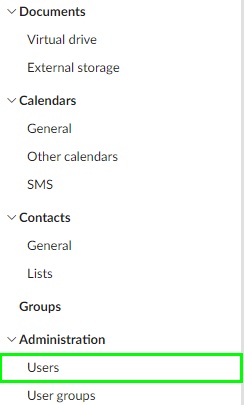
Access the Admin console
- Go to Settings -> Administration -> Users.
Create a user
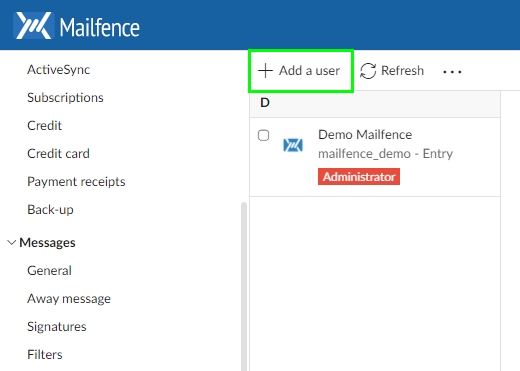
- Go to Administration and click add User.
- Fill in their details.
- Finalize by clicking Create.
- Do not forget to add a provision to your wallet before your attempt to add a user.
Add credit to your master account (Administrator)
- Click on the Link add “Provision”.
- Choose your payment, either credit/debit card or PayPal.
- Finalize by clicking Provision now.
- More information about the provision and the related/available credit of your admin console on “How to provision your admin panel wallet“.
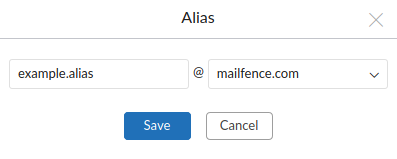
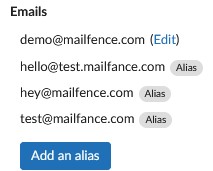
How to add aliases for the User & Administrator
- Select the administrator or a user.
- Click on Add Alias.
- On the left side, fill in the email identifier, on the right side, set your domain.
- Custom or default mailfence one. You can also edit aliases by clicking on the blue Edit button.
Edit Basic Settings for a User
- Select a user.
- Click on “New Password” to edit their password.
- Click on “Disable Account” to suspend the user.
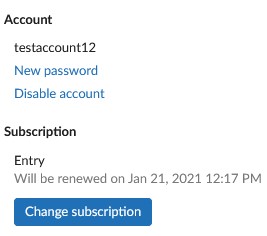
Edit the subscription for a user
- Select a user.
- Click on Change Subscription.
- Select one of the Subscription plans and hit save.
- If you choose to upgrade a user make sure you have credit in your wallet.
User Management
User management (admin console) is a paid plan feature (check pricing) that enables admin account to create additional users.
Here are the number and types of accounts you can create depending on your plan:
- The Base plan does not allow you to manage user accounts.
- The Entry plan allows you to manage 4 user accounts. Two users can be in Free accounts.
- The Pro plan allows you to manage 200 user accounts. Ten users can be in Free accounts.
- The Ultra plan allows you to manage 1000 user accounts. Ten users can be in Free accounts.
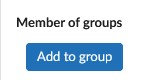
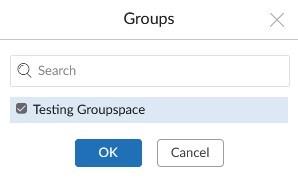
Add groups for the Administrator & User
- Select a user or the administrator.
- Select a group workspace or type a group workspace.
- Finalize by clicking OK.
Do you have additional questions regarding the Admin console? Then email us at support[at]mailfence.com