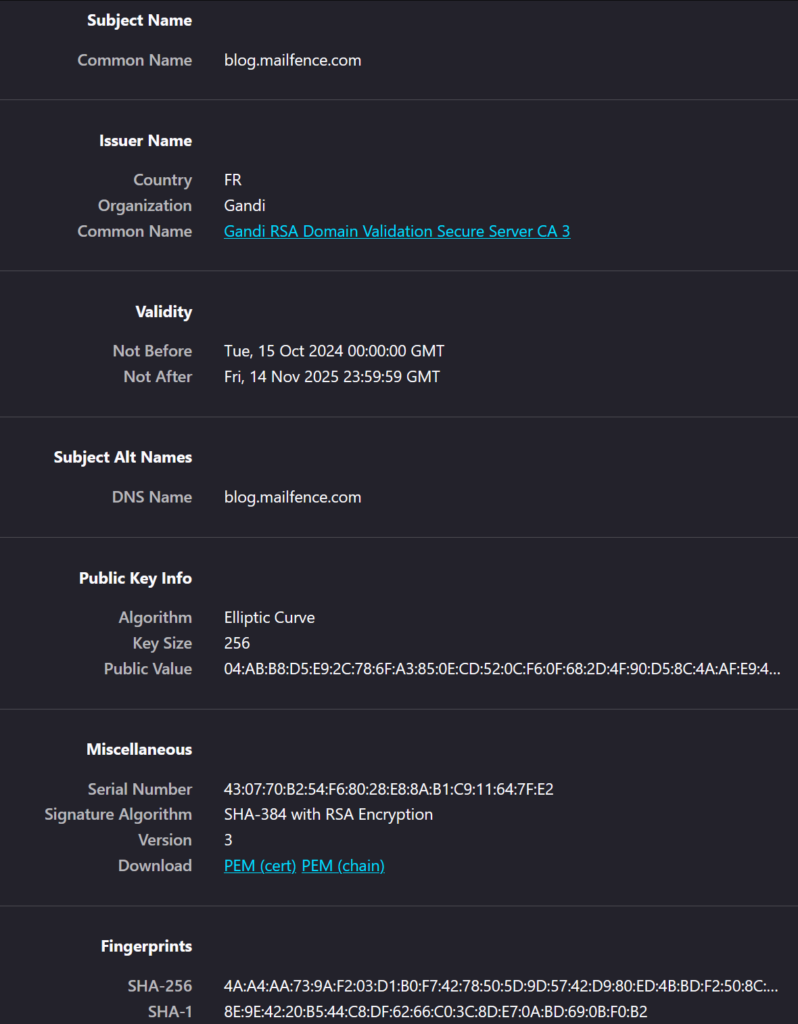
This post provides details over the SSL/TLS certificate for the Mailfence blog.

A modern browser should automatically check the validity of the Mailfence blog SSL/TLS certificate and alert you if it detects something untrustworthy. In case an adversary succeeds in spoofing Mailfence blog (using a rogue SSL/TLS certificate), you will still be able to detect such an (AiTM) attack by manually checking Mailfence blog SSL/TLS certificate fingerprints.
The Mailfence blog SSL/TLS certificate fingerprints/thumbprints (valid until 14/November/2025) are:
SHA1 fingerprint:
8E:9E:42:20:B5:44:C8:DF:62:66:C0:3C:8D:E7:0A:BD:69:0B:F0:B2
SHA-256 fingerprint:
4A:A4:AA:73:9A:F2:03:D1:B0:F7:42:78:50:5D:9D:57:42:D9:80:ED:4B:BD:F2:50:8C:5C:DE:76:CB:0D:BD:FC
If this matches what you see in your browser, then you know you are communicating with the right Mailfence blog website and using the correct public key to encrypt your sensitive information and only Mailfence blog can decrypt it.
Next update date: November 2025
Guidelines:
- For Chrome:
- Click on the lock button in front of the URL.
- Click on the Certificate.
- In Details tab, show All and verify the Thumbprint matches the one above (SHA1).
- For Firefox:
- Click on the lock button in front of the URL, then Connection secure and click on More Information.
- Go to Security and click on View Certificate.
- In General, verify the Fingerprints (SHA1 & SHA-256) matches the one’s above.
- For Safari:
- Click on the lock button in front of the URL.
- Select Show Certificate, in Details scroll to the bottom of the page.
- Verify the Fingerprints (SHA1 & SHA-256) matches the one’s above.
Note: Make sure, in your browser, you are looking at the leaf certificate (blog.mailfence.com). This certificate does not cover mailfence.com and kb.mailfence.com domain names.
At Mailfence – a secure and private email service, we believe in following good security practices, to contribute in providing you a secure and private email solution.