Mandatory
You do not need to perform any modifications if you are only using addresses based on mailfence.com domain name. However, if you have added your own domain name, you must set-up following DNS entries to prevent email spoofing and ensure deliverability:
Sender Policy Framework (SPF):
1. Go your account Settings → Messages → E-mail domains.
2. On your domain name entry, Click on SPF.
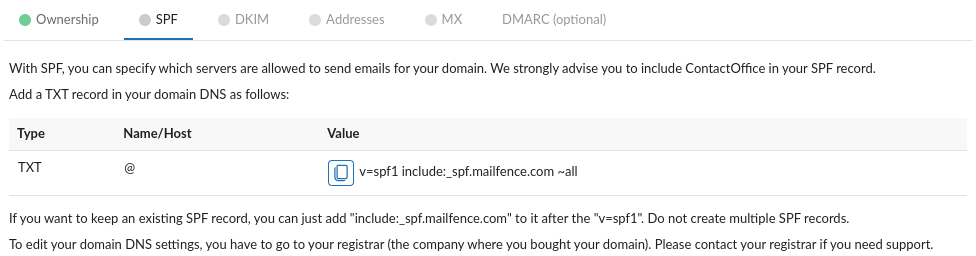
- If emails will be sent only using mailfence.com servers (webmail, SMTPAuth, ActiveSync, forwarding), use following value:
v=spf1 include:_spf.mailfence.com –all - If emails will be sent from other servers as well, use following value:
v=spf1 include:_spf.mailfence.com ~all
3. Once the respective DNS TXT record has been successfully included, click on Verify.
Note: In case you plan to “include” multiple SPF record entries to continue authenticating emails sent from other providers, please be aware of the SPF 10-Lookup limit, which can lead to failed SPF authentication on the receiving side. You can automatically flatten your SPF records by using any external service of your choice e.g., autospf.com (comes with a free plan), etc.
Domain Keys Identified Mail (DKIM)
1. You can either continue in above wizard by clicking on Next, OR if you are doing it at a later time:
- Go your account Settings → Messages → E-mail domains.
- On your domain name entry, Click on DKIM.

- It is recommended to use 2048 bits DKIM key pair. In case your domain-name/hosting or DNS service provider does not support long DNS TXT values, then click on “generate a 1024 bits key”.
- To change (or rotate) your DKIM keypair, check this KB article.
3. Once the respective DNS TXT record has been successfully included, click on Verify.
- If an external tool verifies the existence of your DKIM key but validation still fails at Mailfence, then set-up DKIM signing policy by creating following DNS TXT record:
Name/Host: _domainkey
Value: o=~- ‘o=~’ refers to ‘some, but not all mails from this domain are signed’.
- ‘o=-‘ refers to ‘all e-mails from this domain are signed’.
- Emails will only be DKIM signed after the respective DKIM record has been validated.
Optional
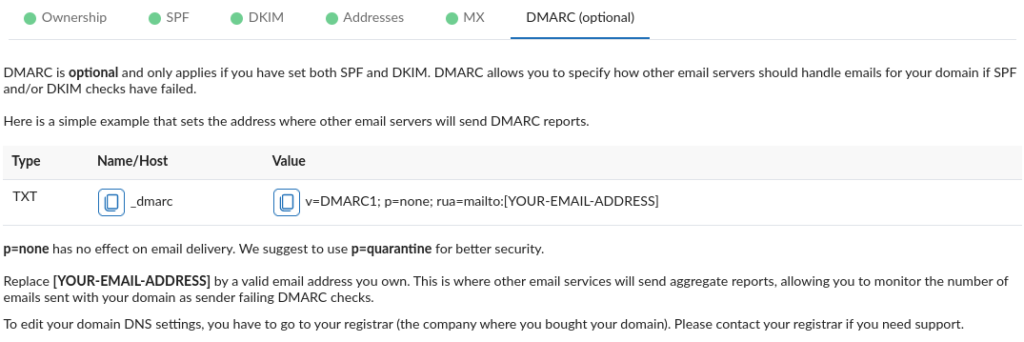
Domain-based Message Authentication, Reporting and Conformance (DMARC)
1. You can either continue in above wizard by clicking on Next, OR if you are doing it at a later time:
- Go your account Settings → Messages → E-mail domains.
- On your domain name entry, Click on any of the DNS entries → DMARC (optional).
2. Before clicking on validate:
- The suggested DMARC entry is report-only (i.e., you will receive DMARC reports indicating spoofing attempts of your domain based addresses). Make sure that you have replaced “[YOUR-EMAIL-ADDRESS]” with an existing address based on the domain name you just added. You will receive one DMARC report (e.g., on daily basis) from mail servers that support aggregate DMARC report sending.
- If the email address in rua=mailto: tag is not based on a domain name you just added, then external reporting authorization would be required.
- You can stop receiving DMARC reports at any time.
- The ‘p=’ specifies the action to take for emails that fail DMARC and none basically means don’t do anything (if SPF and/or DKIM fails) and follow the receiving end policy. The other options are quarantine and reject. Make sure you understand the risks involved on your email delivery before using a policy other than none.
- If there is an existing DNS TXT record with the name/host ‘_dmarc’ for your domain, then edit this record instead of creating a new one. This is important as you can’t have multiple DMARC records for a given domain.
3. Once the respective DNS TXT record has been successfully included, click on Verify.
Mail Transfer Agent-Strict Transport Security (MTA-STS)
Check this blogpost to read about Mailfence support of DANE and MTA-STS.
You can set MTA-STS for your domain name (Mailfence MTA-STS policy can be found here). If you do not have a hosting available for your domain, you can use a Github page.