You can use Outlook to connect to your Mailfence account using SMTP (protocol for sending emails) and POP (protocol for downloading received emails). If you are unclear on which protocol you should use, then please check this blogpost.
This feature is available with Entry, Pro, and Ultra subscription plans.
For Outlook 2016 and newer versions:
1. Open Outlook and go to File menu.

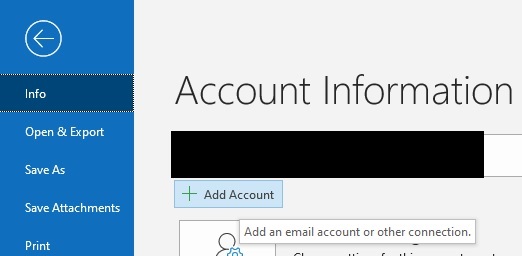
2. In Info tab, Click on Add Account.
3. Enter your primary email address and click on Connect.
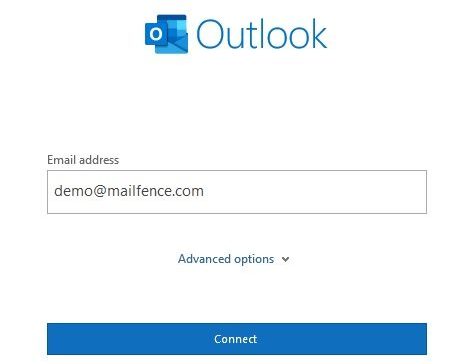
- If the wizard gets stuck, then start again, and click on Advanced options: Check Let me set up my account manually. Mailfence auto-configuration does not work with Outlook 2016 and newer versions.
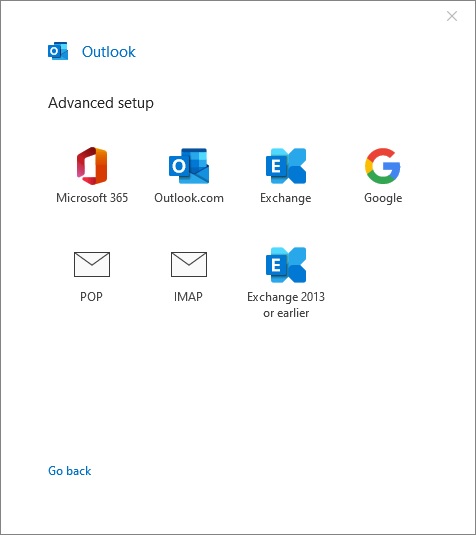
4. Select POP.
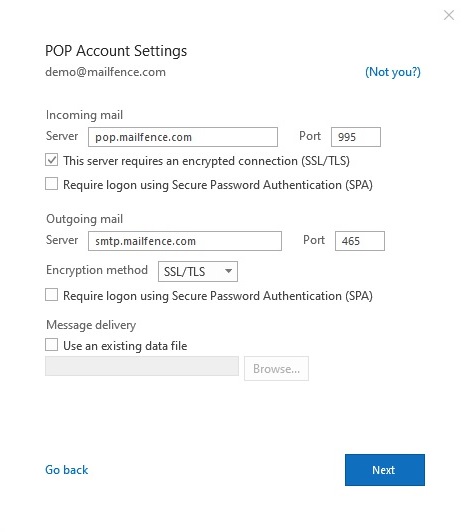
5. Configure POP/SMTP and then click Next.
Do not forget to: Check your account Settings -> Account -> Security -> Services access:
- Make sure that SMTP and POP services are enabled.
- OPTIONAL (highly recommended for TFA enabled accounts): If you plan to use a service specific password then click on Generate a specific password for this service. It will be displayed once. Later, make sure to Revoke it if you want to use your account password.
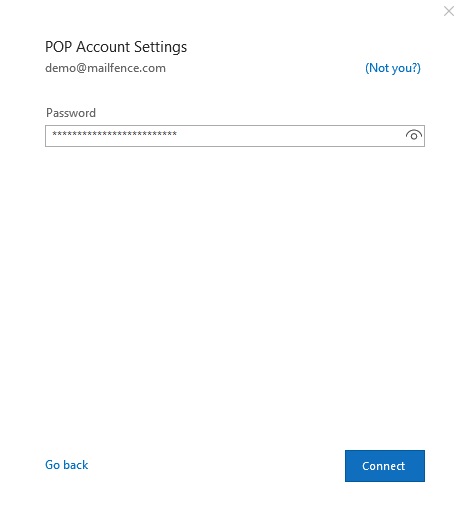
6. Enter your account password and click on Connect.
7. Click on Done.

- Expand your Mailfence account entry (which should appear in left column).
- Click on Refresh sign (or press F9) if you prefer to fetch messages immediately.
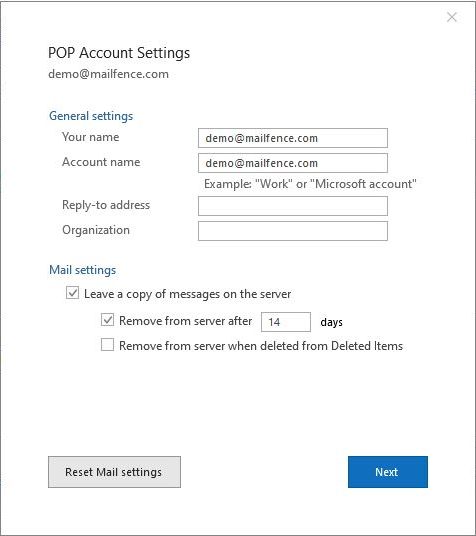
- By default, Outlook leaves a copy of messages on the server (for 14 days). If you prefer to change this, then go to File -> Info -> Account Settings: Account Settings. In Email tab, double-click the entry of your Mailfence account, and Uncheck Leave a copy of messages on the server.
For Outlook 2013:
1. Open Outlook and go to File menu.

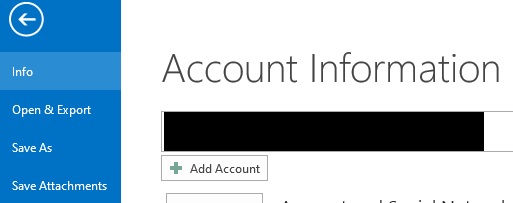
2. In Info tab, Click on Add Account.
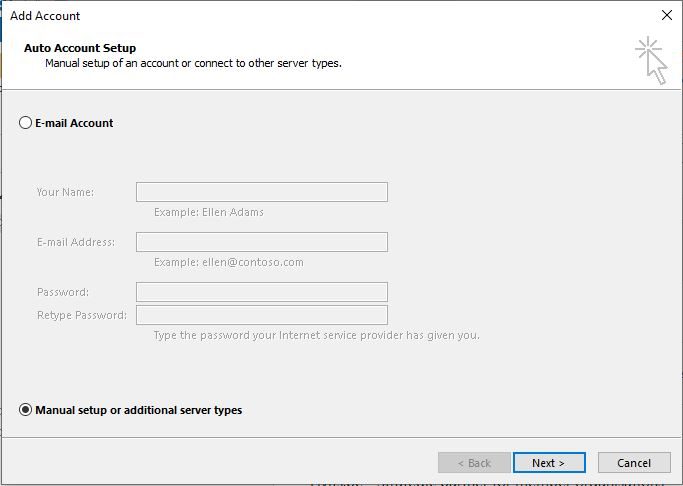
3. Select Manual setup or additional server types and click on Next.
4. Select POP or IMAP.
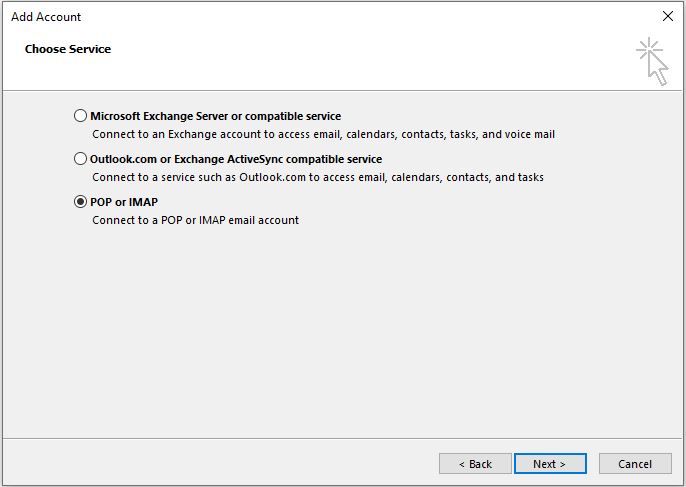
5. Configure POP/SMTP.
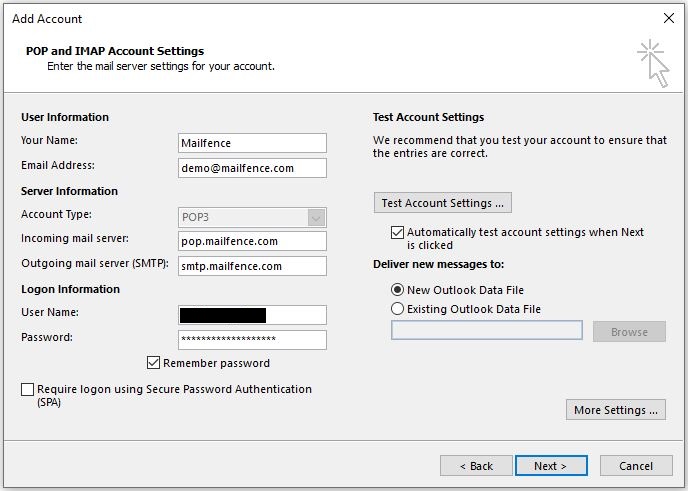
- Alias address cannot be used for authentication.
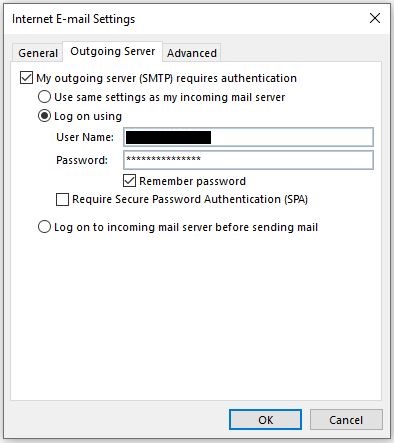
- Make sure you enter your Mailfence account username (which is a different authenticator than primary address) in respective field.
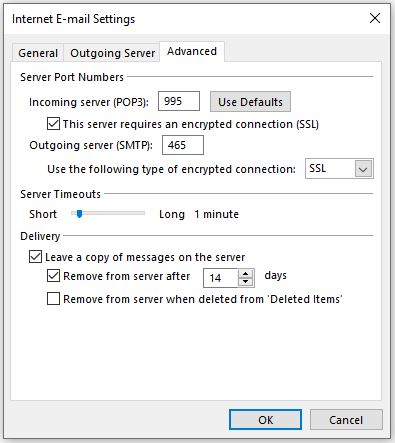
- Click on More Settings:
- Make sure that SMTP and POP services are enabled.
- OPTIONAL (highly recommended for TFA enabled accounts): If you plan to use a service specific password then click on Generate a specific password for this service. It will be displayed once. Later, make sure to Revoke it if you want to use your account password.
6. Click on Next.

7. Click on Finish.
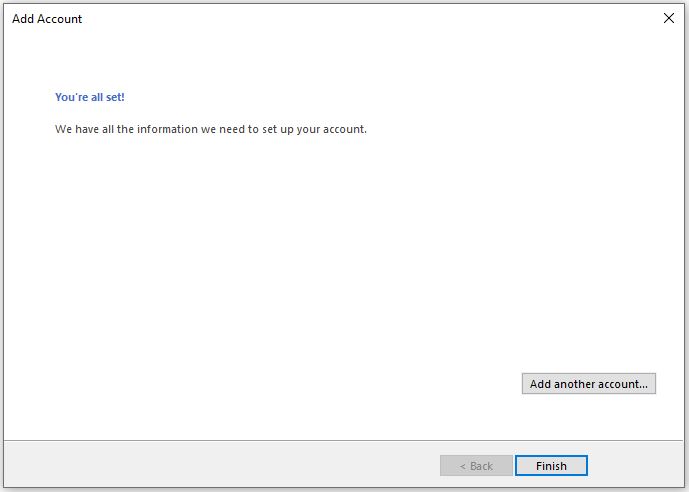
- Expand your Mailfence account entry (which should appear in left column).
- Click on Refresh sign (or press F9) if you prefer to fetch messages immediately.
- By default, Outlook leaves a copy of messages on the server (for 14 days). If you prefer to change this, then go to File -> Info -> Account Settings: Account Settings. In Email tab, double-click the entry of your Mailfence account. Then click on More Settings -> Advanced tab, and Uncheck Leave a copy of messages on the server.

NOTE:
- POP protocol will only download new emails from Inbox folder in Outlook. Emails from other folders will not be downloaded or synchronized. For that, please use IMAP protocol instead.
- Outlook will download new messages automatically after some time (e.g., 30 mins). If you plan to set a shorter polling time, then follow these steps.
If you still face issues in connecting your Mailfence account with Outlook using SMTP and POP, then send us an email to support@mailfence.com (PGP key).